|
Index |
|
This program was originally intended for my own use as an amateur astronomer. I use an 8" reflector with a Dobsonian mount. If you also have a Dobsonian mounted telescope (Dob), you might find the program a very useful tool to find deep sky objects (DSO). If your telescope is mounted in another way, you may find this tool less useful or completely useless.
Astro Helper will tell you the angle of elevation from the horizon (altitude) and the direction in degrees from North (Azimuth) of the selected object. With these two numbers you can point your Dob or other "Alt/Az" mounted scope. The program will allow you to:
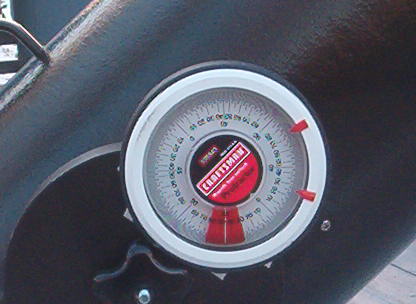
If your telescope has "setting circles", then you are ready to go. If you don't, you will need to install a way to determine the telescope's altitude and azimuth. I spent $15.00 at Sears for a carpenter's compass, which provides the altitude information. I printed out a big circle with software found at Star Trak Software, which provides the azimuth information. You can click here to see what my scope looks like. You will need to calibrate the azimuth each time you move your scope. However, if you attach the compass to the telescope with double stick tape it will not need calibration.
System Requirements:
This program was designed with and only tested using Windows 98. A Pentium processor will provide the minimum processing power for a useful level of performance. The program also requires 16 MB of RAM, 10 MB of hard dive storage, and a resolution of at least 800 X 600. Future versions may require more RAM. For fast response I suggest a minimum of a Pentium III 500MHz and 64 MB of RAM. Although I have only tested this program on Windows 98. It should run on any Windows platform.
After the program loads into memory, you have the choice to review some information about program or to start the program. When you start the program the main screen appears. You will spend the vast majority of your time on this screen. The first thing you need to do is set up your viewing locations. In addition to the normal latitude and longitude information the program will also query you for the altitude (elevation) of obstructions on the horizon in the 8 primary compass directions. You may want to gather this information in the daylight. You may also find that each place you put our scope will have very different horizons.
To select a location you simply need to click on the pull down box's tab and then click on the location desired. Feel free to remove the few sample locations provided. You can either edit them or turn them into your locations or delete them and add all new locations. Each time a new location is selected the position of each display object is updated and the items to select in the object selection pull down tool are reevaluated. To edit the location a location you must fist select it with the drop down box in the upper right of the main screen. You can then click the "Location Editor" button. This will bring up the Location Editor screen. The top half of the screen contains all the normal astronomy software information about your viewing location. The more accurate you can provide this information the more accurate the object positions will be. Instead of typing in negative values for South latitudes and West longitude, there is a check box to the right. The time zone is entered is hours different from GMT. For example Eastern Standard Time is -5. If you are currently using Daylight Savings Time, you need to check that box. If you want this location to come up when the program starts, check the "Primary" box. Below the Save, Delete, and Abort buttons you will find the horizon information. You should key in the lowest an object can be and be successfully observed in each of the 8 directions. You should take into account trees, house, and sever sky glow. The program will "connect the dots" to determine the minimum altitude for point between these cardinal points. Once you have entered all the information about your viewing location, click Save. You can also click Abort to lose the change that you just made. Either action will return you to the main screen. That location will also be selected and any objects that are being tracked will be updated based on the new information. If you want to delete a location, simply select the location, click "Location Editor", and click "Delete". That location will be removed. You will be warned if you have deleted your primary location. If you have no primary location when the program starts it will assume 0 degrees latitude and longitude. If you want to add a new location, simply press the "New Location" button on the main screen. The location editor will appear and you simply need to fill in all the information and click the Save button.
Every time you move your scope you will need to realign the azimuth indicator. The Guide Stars are provided to make this process rather simple. Unfortunately you do need to be able to identify these stars in the sky on your own. If you are in the Northern Hemisphere, Polaris is a very easy target and you can even assume it is at 0 degrees and be pretty close. The program will display up to 22 guide starts that are between 20 degrees and 60 degrees of altitude in increasing magnitude. Objects any higher than 60 degrees will not be good targets for setting the azimuth. Lower targets tend to be obstructed. You do need to have your scope on a level surface. With this requirement you only need to align the scope with 1 star and you are ready to go. If you must set your scope on a surface that is less than level, the accuracy will be diminished, but I have found it tolerable. The goal is not to place the target in the center of your eyepiece, but to get you in the general area. To display the guide stars, simply click the button. When you are done, click it again and any DSOs that you had selected will return.
The primary purpose of the program is to help you direct your scope toward DSOs. With this in mind I have included several Deep Space Object catalogs. These include the Messier Catalog, Caldwell, the "Best of the NGC from the SAC", and the entire SAC amateur astronomy dataset. For those more aggressive I also included the corrected NGC and IC catalogs. This provides over 22,000 objects to find. When the program starts only the Messier Catalog is active. If you have a slower computer you should adjust the limiting magnitude setting before adding the other catalogs. The limiting magnitude starts at 8.0. If you wish to hunt for dimmer objects, you can change the limiting magnitude setting with the arrows or click the "Show All" button to show every object regardless of its magnitude. There are some objects in the SAC dataset that have magnitude of 99.9 or 79.9. This is because there is no published magnitude or the object is a dark nebula. To add additional catalogs simply click on their respective buttons. As you make changes, the total number of object to choose from is updated at the bottom of the display. To select a particular object, click on the big pull down selection list in the top center of the screen. You can the scroll to the object desired and click it. The object will be placed in the center of the screen along with its location. This information will be updated every 30 seconds. To remove an object from the center of the screen, just click it.
The catalogs of DSOs all came from the Internet and are saved in text (txt) files in the same directory you install the program. With one exception, these files are exactly as you will find them at their respective web sites. This will allow you to get updates from their respective web sties. This assumes that the providers do not change to format. These files are:
I am in great debt to the dedicated astronomers that have complied these lists. I have neither the skill nor the patience to even begin to contemplate such a project. I have selected these catalogs because they are targeted at the amateur astronomer and have many interesting and beautiful objects. If you are skilled with a text editor, you can add your own entries to the files and make corrections without worry.
If you do not have a laptop computer or you are observing going where there is no power, you can plan your session in advance (a good idea anyway) and print out the information you will need later. To do this you will probably have to set the time ahead so you get the list of objects that will be visible when you get outside. To do this, click "Now" to turn off the real-time mode. Then edit the date and time displayed in the upper left. Finally click "Set". You can then begin to select the objects you plan to observer. If you are an overachiever and plan to observer more than 22 objects, you will have to repeat the process for each set. After the objects are selected, click "Print Objects Over Time". A small window will pop up. You need to provide the start and end time for you session. By default the time selected will be your start time and 3 hours later will be your end time. The default increment will be 10 minutes. This will create a 1-page report for every 5 objects selected. Each object has it's own column and the new location will be printed for every 10 minutes.